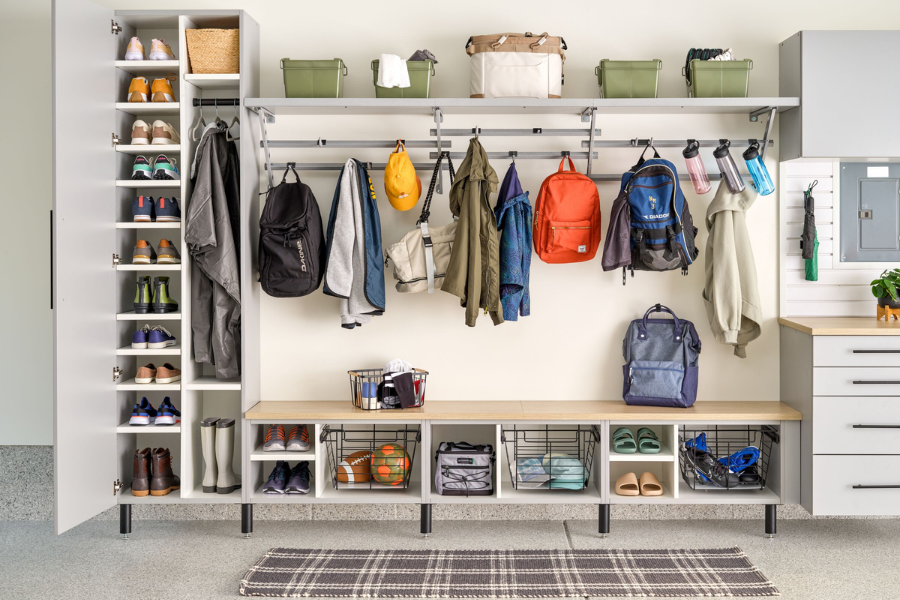
For most homeowners, the garage slowly turns into the place where everything else ends up. Paint cans stack in one corner, bikes lean against boxes, and the one screwdriver you actually need is buried under camping gear from two summers ago. You lose floor space, you lose time searching, and eventually you cannot park the car in the room built for it.
You do not need a full remodel or an expensive custom system to fix it. A practical system is built in layers: clear out what does not belong, divide the space into zones, give tools a visible home, and use the walls and ceiling you have been ignoring. Most two-car garages can be transformed for $300 to $900 in basic shelving, bins, and wall systems.
Start With Sorting and Decluttering the Garage
No shelf can organize clutter. If you skip this step, you will simply store junk more neatly. Pick a dry weekend, pull everything onto the driveway, and sort into four groups: keep in the garage, move inside the house, donate or sell, and throw away or recycle. Be honest about duplicates. Half-empty paint cans, a broken pressure washer, and gear your kids outgrew are taking space your real tools need.
Work category by category so the pile feels manageable:
- Keep only what works: Test tools and small appliances. If it has not run in two years and costs under $50 to replace, let it go.
- Check chemicals carefully: Dispose of old paint, solvents, and pesticides through your local hazardous waste program, never in household trash.
- Group before you store: Pile all automotive items together, all garden tools together, and all hardware together. These piles become your zones later.
- Set a one-in, one-out mindset now: Every new item that enters after this cleanout needs a home before it comes in.
Sweep the empty floor, check for oil stains and moisture, and note where your outlets, water shutoff, and breaker panel are. Keep that access clear in your final layout. Measure the garage, including ceiling height and how far your car doors swing open. Those numbers decide what storage will actually fit.
Plan the Garage in Zones That Match How You Live
Zone-based organization is the idea that makes everything else work. Instead of spreading similar items across the garage, you give each activity its own area, with the most-used zone closest to the house door. A typical layout that suits most families looks like this:
- Everyday entry zone: Shoes, coats, and recycling near the house door, so daily traffic does not cross the whole garage.
- Tool and work zone: Workbench, pegboard, and tool cabinets along one side wall, close to power outlets.
- Garden and outdoor zone: Near the garage door, so mowers, hoses, and rakes go straight outside.
- Automotive zone: Fluids, jack, jumper cables, and cleaning supplies near where the car is parked.
- Long-term storage zone: Holiday decorations and camping gear at the back or overhead, where you rarely reach them.
Sketch the layout on paper before you buy anything. Mark door swings and the exact parking footprint for each vehicle, then leave 24 to 36 inches of walkway where you move most. Tape the zone outlines on the floor and live with them for a day. If you keep tripping over the lines, adjust them now, not after shelves are bolted down.
Store Tools Where You Can See and Reach Them
Tools disappear when they live in deep bins and closed boxes. Visible, shallow storage is better for hand tools you use weekly. A pegboard remains the best value: a 4-by-8-foot panel costs about $25 to $40, plus $15 to $30 for a hook kit, and it holds hammers, wrenches, pliers, levels, and tape measures in plain sight. Mount it 18 to 24 inches above your workbench so tools are within reach but counter space stays clear.
Make Pegboards and Cabinets Work Harder
Outline each tool’s shape on the pegboard with a marker. It sounds fussy, but it shows at a glance what is missing and stops tools landing in random spots. For power tools, use a steel cabinet or shelving with labeled bins for chargers, batteries, and bits, the parts people lose most. A rolling tool chest, typically $150 to $350, is worth it if you work on cars, because you bring the tools to the vehicle.
- Store by frequency: Daily tools at eye level, specialty tools higher or in drawers.
- Label every drawer and bin: Use large labels you can read without reading glasses, on the front, not the lid.
- Keep sharp and heavy tools secure: Hang saws and axes on locking hooks, and store heavy items between knee and shoulder height to avoid lifting injuries.
- Protect against rust: Wipe tools down, and add a silica packet or light oil in closed chests if your garage gets damp.
Set Up a Workbench That Earns Its Space
A workbench does not need to be large. A sturdy 4- to 6-foot bench, 24 inches deep, gives you room for repairs and projects without eating a parking space. Ready-made steel-frame benches run $120 to $300. If space is tight, a wall-mounted folding bench for $80 to $150 folds flat when you park. Bolt it level, add a bench vise ($40 to $80), and choose a top that can handle real weight.
Lighting and power matter as much as the surface. Add an LED shop light above the bench, a power strip at the back edge so cords do not cross your work, and a small parts organizer for screws and anchors. Keep a stool that tucks underneath and a fire extinguisher by the door. When the bench is pleasant to use, projects stop migrating to the kitchen table.
Use Walls and Overhead Space Properly
In most garages the floor is full but the walls are nearly empty. Fixing that imbalance is where you gain the most space. Steel shelving units, 18 to 24 inches deep, cost $80 to $180 each and handle paint, bins, and small appliances well. Wall rail systems with movable hooks, at $30 to $60 per 4-foot section, are ideal for ladders, shovels, and cords because you can rearrange them without drilling new holes.
Overhead Storage Without the Risk
Ceiling racks are perfect for light, bulky, long-term items: holiday bins, sleeping bags, and empty luggage. A 4-by-8-foot rack typically costs $180 to $350 and holds 250 to 400 pounds when lag-bolted into ceiling joists. Never attach one to drywall alone, and never store heavy items overhead. Load bins evenly, label the side facing down so you can read it from the floor, and leave full clearance above the door track and opener.
Give Seasonal and Sports Gear Its Own Home
Bikes, skis, kayaks, and decorations cause more chaos than tools do, because they are bulky and only used part of the year. The fix is rotation. Keep current-season gear near the door, and move off-season gear to overhead racks or high shelves. A reminder in spring and fall to swap them takes twenty minutes and prevents the midwinter hunt for one ski boot.
For everyday sports gear, go vertical. Wall bike hooks cost $10 to $20 each; ceiling hoists at $25 to $50 suit kayaks and cargo boxes. Use a mesh hamper for balls and hooks for helmets and bats. Avoid cardboard for long-term storage. It absorbs moisture, attracts pests, and collapses. Clear bins with latching lids, $8 to $15 each, let you see contents and stack safely three high.
Maintain the System in Small Habits
Garages stay organized because of small habits, not one big cleanout. Return tools to their outline or drawer the moment a project ends, sweep monthly, and do a ten-minute reset on Sunday evenings: walk each zone and put strays back. Twice a year, review each zone honestly. What has not moved in six months needs a better home or needs to leave.
Labeling is your maintenance insurance. When every bin and shelf is labeled, anyone can put things back correctly without asking you. Take a photo of each finished zone and keep it on your phone. That photo is your reset target after a big project or a busy holiday season.
Final Thoughts
An organized garage is not about buying the most expensive system or making it look like a showroom. It is about being able to park the car, find the tool you need in under a minute, and walk through without stepping over piles. Start with the declutter, set your zones with tape, add visible tool storage and one good bench, then lift the rest onto walls and overhead racks. Do it in stages, spend where it counts on sturdy shelving and safe mounting, and keep the habits small. Within a few weekends, the garage stops being overflow storage and starts working as the most useful room in the house.
Frequently Asked Questions
How much does it cost to organize a two-car garage?
A solid basic setup usually costs $300 to $900: two steel shelving units, a pegboard with hooks, ten to fifteen clear bins, and wall rails. Overhead racks and a rolling tool chest can push the total to $1,200 to $2,000. You can spread purchases over several months, starting with bins and shelving.
Will I still be able to park two cars after adding storage?
Yes, if you protect the parking footprint first. Measure each vehicle, tape its outline on the floor, and keep all storage outside those lines. Use walls, shallow shelves under 16 inches deep along the sides, and overhead racks. Folding benches and wall-hung bikes preserve parking space best.
Is pegboard or slatwall better for tools?
Pegboard is cheaper, widely available, and perfect for most hand tools. Slatwall looks cleaner, holds heavier items, and uses sturdier accessories, but it costs two to three times more. Many homeowners combine them: pegboard above the bench for daily tools, slatwall or rails elsewhere for heavy gear.
What is safe to store on overhead garage racks?
Store light, bulky items you need rarely: holiday decorations, camping gear, sleeping bags, and empty luggage in bins. Keep total weight within the rack’s rating and spread it evenly. Never store heavy liquids, paint, fuel, or dense boxes overhead, and always confirm the rack is bolted into joists.
How can I organize a garage if I rent my home?
Focus on freestanding solutions that need no drilling: steel shelving, rolling cabinets, tension-mounted bike poles, and over-door hooks. Use removable wall rails only if your lease allows small holes. Photograph the garage before you start, keep all original fixtures, and choose storage you can take with you when you move.
